Sunday, November 21, 2010

Turkey Sweet Potato Meatballs

As you may have seen via my tweets earlier this week, I went to a "Friendsgiving" celebration on Friday night hosted by my co-worker, friend and fellow foodie, Christine Liang of Your Food Party.  During my dish brainstorm with Christine, she mentioned that it was looking like it was going to be a turkey-less Friendsgiving.  Which got me thinking.  I obviously wasn't going to turn a bird out on Thursday night after work, but I decided I could provide turkey for the celebration in some way, shape, or form and then it came to me- meatballs!  So versatile, so easy, yet somehow everyone thinks you're a superstar when you put them out at a party.  My Friendsgiving meatballs (a teriyaki version) were a huge hit, but I'm not gonna lie, these are even better.  So since I was on such a roll with my meatball making, I figured why not dream up another turkey variation- 'tis the season after all!  While roaming my neighborhood farmer's market today, New Amsterdam Market, I picked up some great sweet potatoes and splurged a little on some amazing dark amber Vermont maple syrup from Ledgenear Farm.  And with those ingredients, some ground turkey and a few other items I had on hand, this fabulous new variation was born.  

Ingredients:
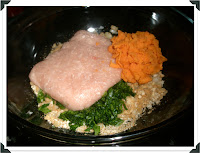
1/2 pound lean ground turkey
1/2 cup sweet potato, mashed
1/2 a yellow onion, chopped fine
2 cloves garlic, minced  
2 handfuls parsely, chopped fine
3 tbsp. breadcrumbs- I like the whole wheat variety
2 tbsp. parmesan cheese, grated 
1 tsp. good maple syrup
Salt and pepper, to taste

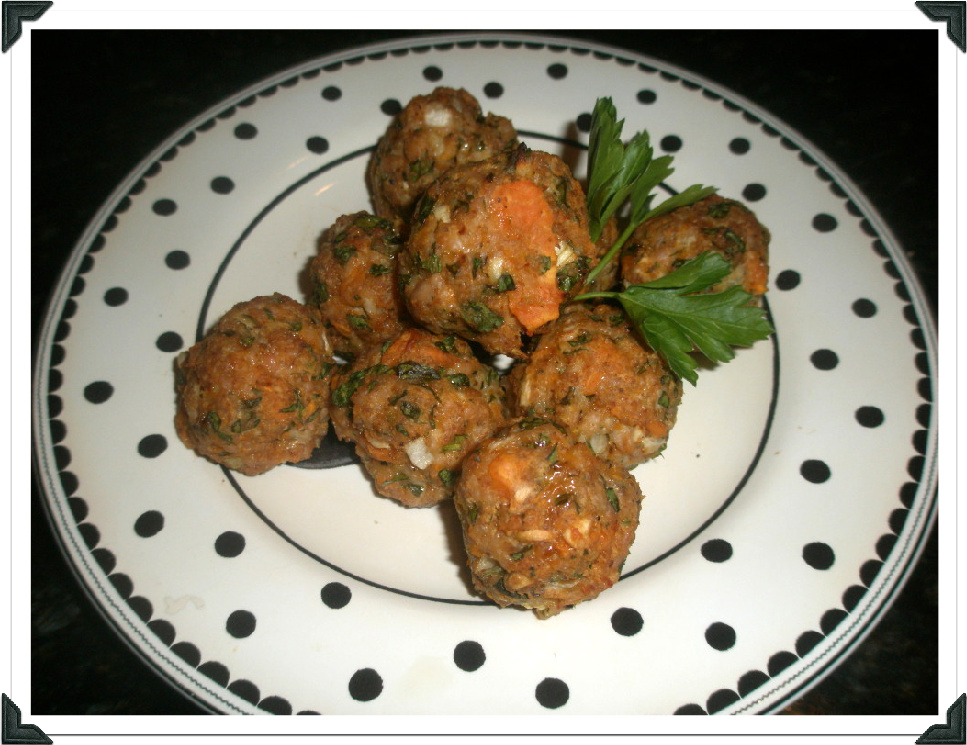
Preheat oven to 400 degrees.  Chop onions, garlic and parsley and combine in a large bowl.  Mix in breadcrumbs and parmesan cheese.  Save yourself some time and microwave the sweet potato.  Mash and add a 1/2 cup to the bowl.  Add ground turkey, drizzle in maple syrup and season generously with salt and pepper.  Mix ingredients with your hands until well combined, being careful not to over mix or the meat will become tough.  Lightly grease a 9x11 baking dish and place meatballs in rows.  Bake for 30 mins or until cooked through.  Eat alone, in a sandwich, or top a salad with them.  Any way you decide to go, I guarantee you won't be able to eat just one!  And definitely double the recipe when bringing some to your "Friendsgivings" :)

Makes about 15 meatballs  

Sunday, November 14, 2010

"Thai" Chicken Salad

For me, moving to New York and falling in love with Thai food seemed to go hand in hand.  I quickly realized that this is one genre of food that had seriously been lacking in my California upbringing.  And while it pains me that I'll probably never find comparable Mexican food in my new hometown, I've realized that on the other hand I'll probably also never find comparable Thai food in California.  So to each its own.  Bring on the Thai, New York.  Although I don't really attempt to re-create many of the Thai dishes I've come to love (note the purposeful quotations in this recipe title), this salad is one item I've taken a stab at.  Traditional Thai Papaya Salad is prepared with green, unripened papaya, cucumbers, carrot, tomatoes, crushed peanuts and a slightly sweet and salty dressing.  It's simple, delicious, and the perfect compliment to any spicy Thai specialty- such as my favorite, lemongrass chicken.  So take a baby step into Thai cooking with my take on this salad.  I use a little green cabbage in place of the papaya (because I've yet to find an unripened papaya in regular grocery stores) and the addition of chicken makes it a little more substantial as a main course option.

Ingredients:
3 cups mixed greens
1 cup shredded green cabbage
1/2 cup shredded carrots
1/2 cup tomatoes, chopped
1/2 cup cucumber, chopped
1/4 cup roasted peanuts, roughly chopped (or more to taste!)
1/4 cup cilantro, chopped
2 chicken breasts, grilled or pan sauteed

Dressing:
1 tbsp. olive oil
1 1/2 tbsp. rice vinegar
1 lime, juiced
1/2 tsp. fresh ginger, grated
a pinch of salt

Begin by grilling or sauteing the chicken breasts, seasoning simply with salt and pepper on both sides.  While the chicken is cooking away, get your other salad fixings together.  Combine mixed greens and cabbage in a large bowl.  Shred the carrots (or buy them pre-shredded as I do), chop your tomatoes and cucumber and toss with lettuce.  When chicken is cooked through, remove from pan and allow to cool.  When the chicken is cooled, chop and combine in bowl.  Whisk together your dressing ingredients in a separate bowl and pour over salad.  Top with cilantro and chopped peanuts and dig in!  Make sure to dress only half of the salad you've built if you plan on saving some for lunch!

Makes 2 large Thai-riffic salads :)

Wednesday, October 27, 2010

Lemon Cilantro Tilapia

Now, let me preface this recipe by saying: you will never see a Brown Bag Gourmet recipe that involves re-heating fish in your office microwave.  First of all, I find re-heating fish to be downright gross and second, "Eau de Fish" is not a friendly scent to send wafting through the halls and down to unsuspecting cubicle dwellers.  

However, I will occasionally suggest a fish dish that you can prepare for dinner and then throw into a salad or a pita sandwich for lunch the next day.  This lemon cilantro infused tilapia, for instance, was fabulous in a salad I enjoyed earlier this week along with mixed greens, shredded green cabage, tomato, cucumber and topped with a lemon vinaigrette.  Lunch vehicles such as this are 100% Brown Bag approved and since tilapia is such a mild, non-fishy smelling fish, this is a great recipe to start with.

Ingredients:
2 tilapia fillets, skin removed
Drizzle of olive oil
1 garlic clove, whole
1 lemon
3 tbsp. cilantro, finely chopped
Salt and pepper, to taste

Begin by seasoning both sides of the tilapia with a good amount of salt and pepper and lightly drizzle each side with olive oil.  Heat a dry saute pan over medium heat and rub the garlic clove across pan so as to introduce a hint of garlic flavor, but not overpower the fish.  Add the fillets to the hot, dry pan to give your fish a crispy exterior but maintain its tenderness on the inside. (Shoutout to my Mama for teaching me this trick!)  Flip fish after a few minutes to build that crispiness on the other side.  Cook for about 3-4 minutes on each side and squeeze lemon juice over tilapia fillets to finish.  Lower the heat and allow lemon juice to warm and infuse into fish, adding about half of the cilantro at the last minute and tossing in pan.  Remove tilapia from pan and garnish with remaining cilantro and a lemon wedge or two.  Dive into this fresh, healthy fish dish for dinner and save your extra fillet to mix into a salad, wrap or pita pocket for a great round 2 recipe the next day!

Makes 1 dinner + 1 heat-free lunch :)

Sunday, October 24, 2010

On the Side: Kale Sautéed with Garlic, Red Onion & Pecans

I'm always up for trying new ingredients (especially ones I feel somewhat embarrassed to have never tried before).  Take kale for instance- it's not exactly the most exotic of ingredients, yet up until this weekend it was somewhat foreign to me.  One thing I did know: it is often prepared similarly to spinach.  Well I love spinach in any preparation so naturally I should love its slightly over-looked leafy, green friend too, right?  My culinary logic seemed correct in theory, and happily proved incredibly successful in practice as well!  It's official, I'm a total kale convert.  And hopefully after you try this delicious side dish, I'll make one out of you too!

Ingredients:
1 large bunch of kale (I suggest going organic for leafy greens like these)
2 tbsp. olive oil
1 large clove of garlic, minced
1 small red onion, diced
1 1/2 tbsp. chopped, roasted pecans
Squeeze of lemon juice to finish
Salt and pepper, to taste

Begin by washing the kale and cutting off the bottom of the stems.  Estimate about 4-5 large leaves for one serving. Begin heating the oil in a large saute pan over medium heat.  Add garlic and saute until fragrant.  Add red onion to your garlic-infused oil to soften the onions and enhance their sweetness.  Slice kale into thin ribbons and add to pan, stirring frequently.  Kale is a significantly heartier green than spinach, so it will take a bit longer to wilt down.  Just make sure to keep an eye on it and stir the pan consistently to avoid any unfriendly burnt flavoring. When wilted, reduce the heat to low and give the pan a quick squeeze of lemon juice and a dash of salt and pepper.  Transfer into a serving dish and sprinkle with chopped pecans to finish.
 
Yep, it's just as easy as that.  I prepared this recipe for just me though, so keep that in mind when adjusting the recipe to serve a group.  And experiment- you may choose to use more or less oil, depending on your preference.  Just make sure there's an adequate amount of oil in the pan to help wilt the kale.  And if you choose to pack up some leftovers for a workday lunch side (I know I plan to!), just make sure to bag the pecans separately and add them after reheating the kale.  That perfect little crunchy element from the pecans is so key!

Sunday, October 3, 2010

This Weekend at the Market...

I live in the Financial District of Manhattan, which isn't always swarming with things to do on the weekend.  So when my roommate picked up a flier a few weeks ago announcing a nearby farmer's market that was set to begin in the Fall, we were rather excited.  This afternoon we set out for the New Amsterdam Market, tote bags in hand and with the highest hopes of actually filling them with exciting market finds.  Thankfully, that we did.

To our surprise the market was brimming with all sorts of vendors from organic farms with fresh produce and veggies (quite reasonably priced) to cheese artisans to wineries and even a Kombucha station.  There was definitely no shortage of variety and almost every stall happily offered samples, which we of course accepted equally as happily (the wine tastings in particular!).  So after making our rounds, we circled back to our favorites to pick up some lunch fixings.  Back at the apartment, we assembled a beautiful selection of most of our goodies and added a few grape tomatoes and sliced cucumbers to round out our plate.  Check out a little sampling of our spread!


This weekend's picks:
Snack-sized local gala apples (Breezy Hill Orchard)- crisp, sweet and delicious
Whole grain Rye (Nordic Breads)- crusty outside, chewy inside: definitely the "health foods" item
Cow's milk Asiago cheese (Narragansett Creamery)- made even more fabulous with a sprinkle of truffle salt from our pantry
Cow's milk feta and olive spread (Narragansett Creamery)- creamy, dreamy, salty, tangy love 
Local Bosc pears (Breezy Hill Orchard)- not pictured
Organic red bell peppers (McEnroe Farms)- not pictured

With the vendors varying from weekend to weekend, we can't wait to see what we discover next Sunday!  Stay tuned :)

Autumn Butternut Squash Soup

Butternut squash is one of my absolute favorite flavors of fall.  Its savory, yet slightly sweet qualities are intensified when slowly roasted with a drizzle of olive oil and salt and pepper.  Or alternatively, with a combination of butter, sugar and cinnamon as a sweet dessert option.  Pretty much no matter how you choose to serve it, it's fabulous!  So with temps dropping and all of the recent rain in NYC, it felt like the perfect time to whip up a batch of cozy butternut squash soup.  This simple, yet deeply flavorful soup celebrates some of the best ingredients of the season and will have you welcoming the cool weather, knowing you have a big bowl of it to warm you up!  

Ingredients:
1 1/2 tbsp. unsalted butter
1 leek, cleaned and trimmed (Trader Joe's is great for this)
1 large apple (I like Braeburns for their tart & sweet flavor combo)
2 1/2 cups roasted butternut squash
3 1/2 cups low sodium chicken broth
1/2 tsp. fresh ginger, grated
1/8 tsp. ground cinnamon
Salt and pepper, to taste
Toasted pecans and roasted squash seeds, to garnish

Begin by roasting your squash.  Preheat oven to 400 degrees.  Cut one large butternut squash in half lengthwise and scoop out seeds as you would a pumpkin, only easier!  Rinse seeds and set aside.  Place squash halves on a baking sheet flesh side up and season each half with 2 tsp. olive oil and a generous sprinkling of salt and pepper.  Spread out seeds alongside squash and sprinkle with salt and pepper as well.  Place baking sheet in oven and roast away!  Check on the seeds about 10-15 minutes in and remove from sheet when sufficiently roasted.  All in all, it will take about 45 minutes to cook the squash until fork tender, possibly longer depending on your oven and the size of your squash.  But it's so worth the wait!

Once your squash is done, remove from oven to cool and begin building the base of your soup.  Chop apple into small cubes and prepare the leek.  Leeks impart a lovely, light onion flavor without the sharpness of regular onions.  However they are known for being notoriously gritty, so make sure your leek is clean by floating it in a large bowl of water to remove any grit from the inner layers.  Pat dry after rinsing and slice leek into thin ribbons.  Melt the butter in a large pot over medium heat and add leeks and apples.  Saute for about 3-4 minutes until softened.  While that's cooking, remove the skin from the cooled butternut squash and cut into small cubes.  Add squash to pot and pour in chicken broth.  Add grated ginger and cinnamon and simmer for 20-30 minutes to develop flavors.  Ladel into a blender and puree until smooth, or use an immersion blender if you're lucky enough to have one.  Definitely on my kitchen wish list!  Add back into pot to warm through.  Spoon into a bowl and top with roasted seeds and toasted pecans.  Since this recipe is a little more time consuming to prepare, it makes for an ideal weekend dish.  Dive into a bowl for dinner and pack some up for lunch during the week!

Makes about 3 1/2 to 4 cups.         

Wednesday, September 29, 2010

Super Simple Chicken Masala

When I sat down with this dish at the lunch table, I literally had people asking me where I had ordered Indian from.  They were shocked to hear I had prepared it myself and even more shocked when I explained to them how quick and easy it was.  The star ingredient that brings this whole dish together is the masala sauce.  But guess what, it's already done.  Trader Joe's does all the work for you.  TJ's for the win, yet again!  Now don't get the wrong impression; I'm not huge on prepared sauces but I'm telling you, this one is fantastic.  Plus, it saves you some major time and effort.  Believe it, restaurant quality chicken masala is just a few simple steps away!

Ingredients:
2 tbsp. olive oil
1 clove garlic, minced
2 large chicken breasts, cut into chunks
1 small yellow bell pepper, sliced
1 small red bell pepper, sliced
1/2 pound french green beans
1 jar Trader Joe's Masala Simmer Sauce
1 tbsp. chopped cilantro
Salt and pepper, to taste

Heat oil in large pan over medium heat and saute garlic until fragrant.  Cut chicken breasts into cubes and add to pan.  Season lightly with salt and pepper.  The chicken will only take a few minutes to brown, so just be careful not to over cook.  Add bell peppers and green beans to the pan, and lower heat so that veggies are cooked, but still maintain a slight crunch.  Pour entire jar of masala sauce over chicken and veggies and allow to simmer until entire mixture is heated through.  Serve atop some brown rice- I love Brown Rice Medley (also made by TJ's) as seen here.  Sprinkle with cilantro and there you have it, Indian takeout in a flash!     

Makes about 3 servings.